[DOTEC-AUDIO x Nu:Tekt] How to make Custom Effects for NTS-1
Creating custom plugins for the NTS-1 might seem pretty daunting, but fret not!
In this 5-part series of articles we will explore together with DOTEC-AUDIO how to create custom effects for NTS-1, step by step!

Article #1: Making Custom-Made Effects Work with the NTS-1
Hello, everyone! My name is Shinji Iijima from DOTEC-AUDIO, a plugin development company.
Up until now we have mostly developed audio plugins only for PC and iPhone / iPad.
https://dotec-audio.com/
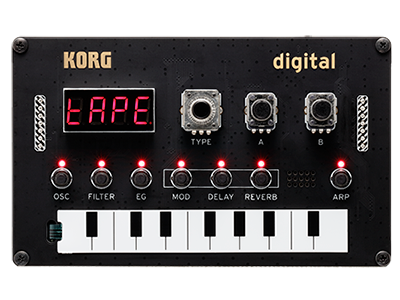
The Nu:Tekt NTS-1 digital kit” (hereafter abbreviated as the “NTS-1) is an extremely interesting yet affordable build-it-yourself digital synthesizer kit. So, why is DOTEC-AUDIO, a PC plugin developer interested in this synthesizer? It’s because this synth lets you write your own programs and then install the sounds (oscillators) and effects you’ve developed into the NTS-1.
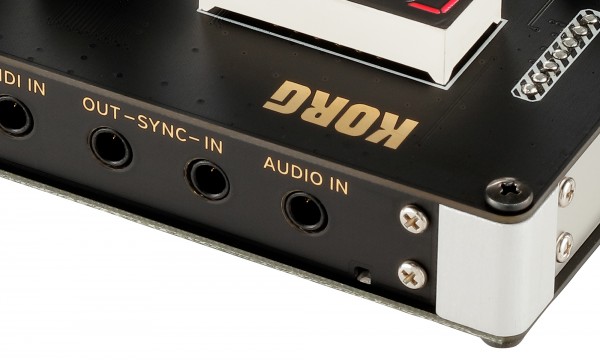
Another interesting thing about the NTS-1 is that it has a stereo audio input (line input). What this means is that you can hook up a sound generator or a musical instrument, and use this unit not just as a synthesizer but as a compact standalone effects unit.
In other words, you get a synthesizer that you can freely program, as well as effects. When you hear that, it really makes you want to try it yourself, don’t you think?
OK, so let’s get started. Take a look at this video!
This is a “bit crusher,” an effect that gives you a coarse, low-res sound.
And…
This the vinyl stop effect, which gives you the sound of stopping a vinyl record with your hand.
Both of these effects contain part of the multi-effects functionality from DOTEC-AUDIO’s “DeeFX,” brought to the NTS-1.
As you can see, what’s so interesting about this is how you get not only the NTS-1 oscillators, but also effects that you can apply to the audio input! In this article series, I’d like to talk about developing effects for the NTS-1, focusing on these two effects.
If you’ve already purchased an NTS-1, definitely download these effects and play with them yourself!
How to install
- 1/ Install the NTS-1 Sound Librarian
First of all, install the NTS-1 Sound Librarian software on your computer (Win/Mac).
Follow the instructions to install the software, and make sure to connect the NTS-1 to your computer. - 2/ Download the effect files
Next, download these effect files developed by DOTEC-AUDIO.
Download Bitcrusher here
Download Stop FX hereDecompressing this ZIP file will give you the “bitcrusher.ntkdigunit” and “stopfx.ntkdigunit” files.
- 3/ Load these files into Sound Librarian
To load the files, go to the “File” menu, click “Import User Unit” and select the files you decompressed. Once you do this, the “bitcrusher” effect is added to the “USER MODULATION FX” category, and the “stopfx” effect is added to the “USER DELAY FX” category.
Last, go the “Send/Recv.” menu and select “Send User Data” to transfer these two effects to the NTS-1.
Once the effects are transferred, you’ll be able to select “bitcrusher” from “Mod”, and “stopfx” from “delay” on the NTS-1.
See you next time!
Article #2: How to Prepare to Develop Effects for the NTS-1
Hello, everyone! I’m Shinji Iijima from DOTEC-AUDIO.
Last time we talked about the effects we actually made for the NTS-1. Have you tried them out yet? This time, I’ll explain the environment you’ll need to create your own original effects (and oscillators) for the NTS-1.
Actually, the basics you need to know are found in the “logue SDK” page, so this time, I’ll be giving you some added details. I should mention that everything I’m explaining is available free of charge. Also, one of the appealing things about this is that you can develop in Windows, macOS or Linux, so just about anyone can do this.
(Note that the installation steps differ with each OS.)
logue SDK
https://korginc.github.io/logue-sdk/
To begin, let’s talk about what an “SDK” is. SDK stands for “Software Development Kit,” which is a set of tools necessary to develop specific software.
For instance, you’ll use the Windows SDK to develop apps for Windows, or the iOS SDK to develop apps for the iPhone. When developing for the NTS-1, we use the “logue SDK.” https://github.com/korginc/logue-sdk
The SDK that’s released here is the logue SDK itself. The best thing to do is to use Git software to obtain the latest version of the SDK, but to do that you’ll need to know how to use Git.
For that reason, it’s fine just to go to the Web page listed above and click on the green “Clone or Download” button to download the files as a ZIP archive. Note that the SDK is sometimes updated, so it’s a better idea to use Git if you always want to obtain the latest version of the SDK.
MSYS2 (for Windows)
https://www.msys2.org/
The thorniest matter to deal with when you consider building an NTS-1 development environment for Windows is “MSYS2.” I’d like to explain about that now. All of the GNU commands used with the logue SDK execute commands with the Unix OS as a prerequisite.
For Linux, which is basically Unix, or macOS, which is based on Unix, you’ll be able to install using a bare minimum of tools. However, for Windows you’ll need an additional environment that can execute Unix commands. Simply put, MSYS2 is a platform for executing Unix commands on Windows. Because of this, if you’re developing with Windows and MSYS2, you’ll run your commands within the “MSYS2” window.
Run a Web search on “NTS-1 MSYS2,” and you’ll find articles that list the specific steps required. I definitely encourage you to use those sites for reference.
GNU Arm Embedded Toolchain
https://github.com/korginc/logue-sdk/tree/master/tools/gcc
To develop programs, you need a “compiler,” which is a software that converts programs written by humans into machine language that’s readable by a computer. With the logue SDK, we’ll use the “GNU Compiler Collection” (GCC for short).
The GCC is such a complicated topic in its own right that we could write a thick book about it, so I’ll skip that for now. Suffice to say that the “GNU Arm Embedded Toolchain” explained on this page is the name of a set of programming tools that includes the GCC.
The “Arm Embedded” refers to the “STM32F4” chip with an Arm CPU that’s used on the NTS-1. The toolchain we’re referring to is used to develop programs that run on this CPU.
As you can see in the Readme file, all you need to do to install is to run the prepared shell script.
GNU Make
https://github.com/korginc/logue-sdk/tree/master/tools/make
“Make” is a tool that lets you configure a single command to save you the trouble of executing many commands and compiling your files each time. (Make is another tool we could take up a whole book to write about.)
Make does not need any additional special installation on macOS, Linux and Windows (and MSYS2), but we will explain where it is otherwise necessary to install.
Info-ZIP
https://github.com/korginc/logue-sdk/tree/master/tools/zip
This is a tool used to create ZIP files, and as with GNU Make it doesn’t require special installation on virtually any platform.
logue-cli (optional)
https://github.com/korginc/logue-sdk/tree/master/tools/logue-cli
This is an “optional” component, and not everyone needs it. Think of this as the command-line variant of “Sound Librarian,” which we described last time. Note that there is a Windows and macOS version of Sound Librarian, but not a Linux version.
For that reason, if you’re planning to develop on Linux, you’ll need to install this tool. Once you’ve successfully installed these tools, let’s build (create the program for) the sample components included with the SDK.
We’ll use the steps in the “Demo Project Build (Waves)” ( https://korginc.github.io/logue-sdk/) to build.
If you’ve successfully executed the commands, a file named “waves.ntkdigunit” will be generated. This should be loaded into the “USER OSCILLATORS” of Sound Librarian as “waves.” If you’ve gotten this far, the next step is programming! It’s a bit of a chore to get things up and running.
The good thing is that there’s a lot of information on the Internet about these tools, so I encourage you to poke around on the Web to get your environment all set up!
See you next time!
Article #3: Creating an Original Effect, Part 1
coming soon
Article #4: Creating an Original Effect, Part 2
Coming soon
Article #5: Building a Vocoder
Coming soon
Both of these effects contain part of the multi-effects functionality from DOTEC-AUDIO’s “DeeFX,” brought to the NTS-1.


